Blazor GameDev – part 2: canvas initialization
Hi All! Welcome to part 2 of the Blazor 2d Gamedev series. Today we’re going to see how to initialize the canvas and start rendering something.
Last time I’ve introduced the GitHub repo, so if you haven’t already, feel free to take a quick look at the code of the various examples.
I also managed to deploy all of them to GitHub Pages, using the steps I’ve outlined in another post.
So, for our first example, we’ll start with something easy and gradually build from it.
Step one is to add a reference to Blazor.Extensions.Canvas . It’s a nice NuGet library that wraps the HTML 5 Canvas api for us.
Then we have to add a canvas element in our Razor page:
<div id="theCanvas" style="position: fixed; opacity: 1; background-color: black; width: 100%; height: 100%">
    <BECanvas Width="300" Height="400" @ref="_canvasReference"></BECanvas>
</div>
Notice the reference, we’re going to need it later. When the page initialization is complete, we have to inform the HTML canvas and do some other setup. We can do it by leveraging the JsRuntime and run a plain JS function we’ve exposed in our index.html:
protected override async Task OnInitializedAsync()
{
        await JsRuntime.InvokeAsync<object>("initGame", DotNetObjectReference.Create(this));

        await base.OnInitializedAsync();
}
The function name is initGame, we’ll use it to subscribe to some useful events on the window **and the canvas objects. More on this in the next posts.
<script src="_content/Blazor.Extensions.Canvas/blazor.extensions.canvas.js"></script>
<script>
    function gameLoop(timeStamp) {
        window.requestAnimationFrame(gameLoop);
        theInstance.invokeMethodAsync('GameLoop', timeStamp);
    }

    window.initGame = (instance) => {
        window.theInstance = instance;
        window.requestAnimationFrame(gameLoop);
    };
</script>
For now, the “only” thing we do is leverage window.requestAnimationFrame() to begin the render loop. The idea is quite simple: on every call to requestAnimationFrame() we’ll invoke a C# function this time and update the canvas’ status. Ideally, we should get 60fps, but of course, this might change based on how complex our system becomes.
The C# function has to be public and decorated with the JSInvokable attribute. We will use it to update our state and render the current frame:
[JSInvokable]
public async ValueTask GameLoop(float timeStamp)
{
    // update & render
}
Also, don’t forget to include the blazor.extensions.canvas.js script, otherwise our Canvas wrapper won’t work.
The next step is to use the reference to the Canvas element to generate the wrapper. We have to do it in OnAfterRenderAsync() in order to be sure that all the required HTML elements are in place:
protected override async Task OnAfterRenderAsync(bool firstRender)
{
if (firstRender)
{
_outputCanvasContext = await _canvasReference.CreateCanvas2DAsync();
await _outputCanvasContext.SetTextBaselineAsync(TextBaseline.Top);
}
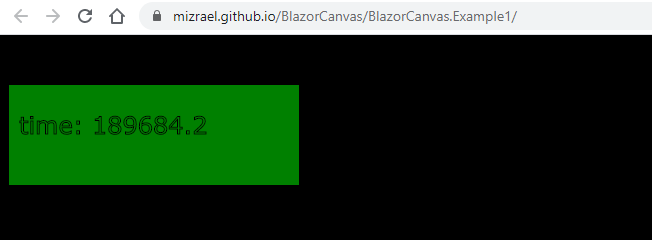
}That’s enough for today. Our render loop will be extremely simple this time, we’ll be just rendering the current application time:
 </figure>
Next time we’ll see how to handle window resizing and how to render a sprite. Don’t forget to check the full code, it’s available here !
Did you like this post? Then