How to scale your services with Docker during development
Hi All! Today we’re going to see how we can leverage Docker to scale and spin up multiple instances of a service on our machine.
It’s a matter of fact: live and dev boxes are not the same. Code working on your machine is likely to not work when deployed. In some cases, this happens because you’re running a single instance of a service when developing. But maybe that service is instantiated multiple times once deployed.
So unless we have very good instrumentation or we start going down the remote debugging path (when possible), the only option is to replicate the services also on our machine.
Luckily, we can use Docker to do the grunt-work for us!
The first thing to do, if you’re not doing that already, is to build a Dockerfile for our service. If you’re using Visual Studio (and you’re lazy like me), you can have it generate the Dockerfile automatically.
Visual studio can do that either when creating a new project or later on.
The next step is to create a nice docker-compose config file. Something like this should work:
version: '3.8'

services:
  api:
    image: ${DOCKER_REGISTRY}myservice:latest
    build:
      context: .
      dockerfile: MyService/Dockerfile
Here we’re defining one single service named “api”, starting from our image “myservice”.
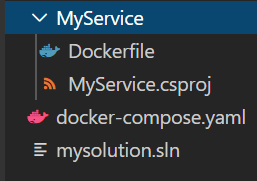
We will save this config in the root folder, along the .sln file:
If we run the command docker-compose up, we should see the service starting up.
Now, to scale horizontally, we’ll need to setup a Docker Swarm. It will allow us to host and manage a cluster of Docker Engines and spin up multiple instances of our service.
But first, we’ll have to host the image on a registry. We could pick any registry we like or have one on our machine:
docker run -d -p 5000:5000 --name registry registry:latest
docker start registry
This will start the registry on localhost:5000 .
Now we have to tag and push our service’s image to this registry:
docker image tag my-image localhost:5000/myservice
docker push localhost:5000/myservice
The next step is to build the docker-compose config and push it to the repo. If you recall, we used a DOCKER_REGISTRY environment variable when we defined the service image. We can set it to localhost:5000/ and then run
docker-compose build
docker-compose push
We’re getting close. Now we have to create the swarm by running docker swarm init and then we can deploy our service as a Docker Stack:
docker stack deploy --compose-file docker-compose.yml myAwesomeSystem
Notice that we have to provide a name to the Stack. We might want to add multiple services to our docker-compose file later on (eg. databases, monitoring tools and so on), so it’s better to use a different name.
By default, we still have a single instance though. We have to update the docker-compose config and add the replicas settings:
version: '3.8'

services:
  api:
    image: ${DOCKER_REGISTRY}myservice:latest
    build:
      context: .
      dockerfile: MyService/Dockerfile
    deploy:
      mode: replicated
      replicas: 6
Save, and run the docker stack deploy command again.
We’re done! If you want to make sure the replicas are running, just execute docker stack services myAwesomeSystem .
When we’re done coding we can shut down the swarm and clean up all the dangling images and containers:
docker swarm leave --force
docker system prune --all --force
Happy swarming!
Did you like this post? Then